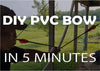


A Beginner's Guide to Building a PVC Bow and Arrow in Just 5 Minutes.
Making a PVC Survival Bow
In the realm of survival crafting, mastering the skill of creating your own tools can be both empowering and essential. One such indispensable tool is a bow and arrow, a versatile weapon that dates back centuries. Bows can be made from many different materials but in this beginner's guide, we'll delve into the art of crafting a survival bow using a readily available material in urban environments– PVC pipe. With just a couple materials you can craft your own PVC Survival bow in just a few minutes. Though there are many types of PVC bows you can make, today we're going to focus on speed, and using minimal tools to create a serviceable bow in a pinch! You can find the video walkthrough below, or read on for the written walkthrough.
Why Make a PVC Bow?
PVC is a readily available material to use to easily create a functional bow to learn to shoot without investing in something expensive. If your just getting into bow making, pvc is a great place to start before moving on to more expensive and exotic materials as well. As far as a survival tool PVC is not just something found in urban areas you can find PVC in many rural areas like cabins, old houses etc where pvc can be reclaimed if needed. Because these bows are so inexpensive and fast to make, you can easily make several ahead of time and store them at your bugout location.

Section 1: Understanding the Basics of PVC Bow Crafting
PVC Pipe as a Crafting Material
Before diving into the process, it's crucial to understand why PVC pipe is an excellent choice for crafting a survival bow. PVC, or polyvinyl chloride, is not only durable and readily available but also flexible enough to be shaped into a functional bow and can be very versatile even while not using it as a bow as it allows you to make a fully functional bow, for just a few dollars.
Section 2: Gathering Your Materials and Tools
Equipping Your Crafting Arsenal
To embark on this DIY journey, gather your materials and tools. You'll need a length of Schedule 40 or schedule 80 PVC pipe 3/4" or 1" diameter (about 5' long), a serrated cutting tool (knife with serrations, saw, or in a pinch a piece of Kevlar cordage or inner strand of paracord can cut PVC pipe) and sandpaper or a file. Safety gear, such as gloves and eye protection, is recommended.
Section 3: Measuring and Cutting Your PVC Pipe
Subtitle: Precision Matters
Measure and mark your PVC pipe according to your desired bow length. Keep in mind that a standard bow length is around 60-68 inches for optimal functionality. Once marked, carefully cut the pipe using your cutting tool, ensuring a straight and even edge. You can use either Schedule 40 or Schedule 80 PVC. The Schedule 80 will be a stiffer bow with higher poundage. You can also use either 3/4" or 1" PVC the 1" material will have a higher poundage draw weight as well.
Section 4: Find the Center
To find the center of your PVC bow if you don't have a tape measure, you can take a length of cordage and measure one end to the other, then fold it in half to find the center. Mark the center point of your bow

Section 5: Adding Notches for Bowstring
Getting Ready To String
From the top and bottom of the bow, mark about 1 Inch from each end (roughly the width of your thumb. Cutting across and slightly downward from this mark to create your bowstring notches on your bow. This hole needs to be the width of your paracord so it sits properly (here you can see how to mark and cut the string notches)

Section6: Adding the Bowstring
Stringing it Together
Select a durable paracord or a specialized bowstring material. Paracord works, well but it does stretch some so you may have to shorten the string over time by adding an additional knot. Tie a double knot about 4-6 inches shorter than the bow itself to start. Attach one end to the lower nock, then bend the bow slightly to create tension as you secure the other end to the upper nock. Achieving the right tension is key – too loose, and your arrows won't fly true; too tight, and you risk damaging your bow. A good rule of thumb (pun intended) is when your bow is strung you should be able to rest the bottom of your fist on your bow, and holding your thumb up, it should just touch the string on your strung bow. Adjust your string accordingly until it is as close to your thumb as possible.

Section 7: Testing and Refining Your PVC Bow and Arrow
Fine-Tuning for Precision
With your PVC bow crafted and strung, it's time for the moment of truth. Test your creation by shooting a few arrows. Pay attention to the bow's performance, arrow trajectory, and your shooting stance. If adjustments are needed, revisit earlier steps, refining until you achieve the desired results. These bows are very basic, and might need some adjustments.
Section 8: Higher Draw Weight
Heavyweights
There are several ways to increase the poundage of your PVC Bow. You can insert fiberglass rods like driveway stakes, use broken fishing rods, insert smaller diameter PVC pipe, broken tent rods, even green wood to make your bow have higher draw weight, which results in more impact and speed when the arrow hits true hopefully resulting in more success if you need to use this bow to hunt with.
below you can find a video covering increasing the draw weight on your PVC bow easily.
Knowledge is Power.
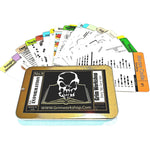
Crafting a PVC bow and arrow is a gratifying journey into self-reliance. With the right materials, tools, and a bit of patience, you can transform a humble PVC pipe into a functional survival tool. For tips on shooting a bow check out our weatherproof archery tip card. This beginner's guide is just the starting point – feel free to experiment, refine, and make the process your own. Happy crafting!
For survival cards, arrowheads and more tools to make this bow visit us at grim workshop